Fuel Tank
SAFETY FIRST: Protective gloves and eyewear are recommended at this point.
Inspect the fuel, vent and vacuum hoses for damage and deterioration. Replace the hoses as needed.
Note: the 1988-1989 600cc models have a single fuel hose that runs to the carburetors. The newer model 600 and 750cc models have two fuel lines that route from the petcock to the carburetors.
Removal
Remove the rider seat. See the Seats topic for more information.
Remove the upper fairings. See the Fairings topic for more information.
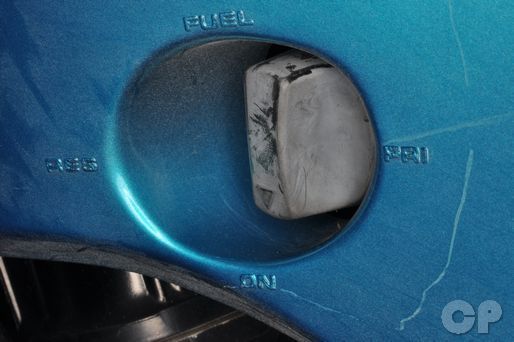
Turn the petcock valve to the on (down) position. To drain the fuel tank remove the fuel line/s from the carburetors. Place the open end of the fuel line/s in a suitable container and turn the petcock to the prime position.


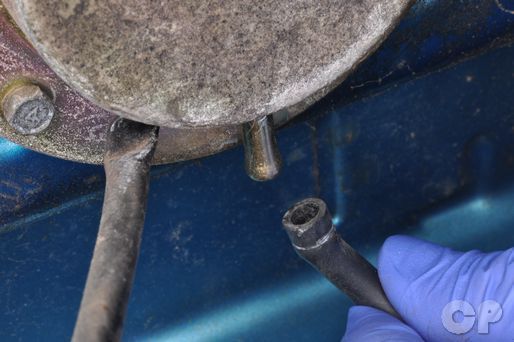
Loosen the two fuel tank mounting bolts with a 10 mm socket. Remove the bolts.


Unplug the fuel level connectors on the right side of the tank.


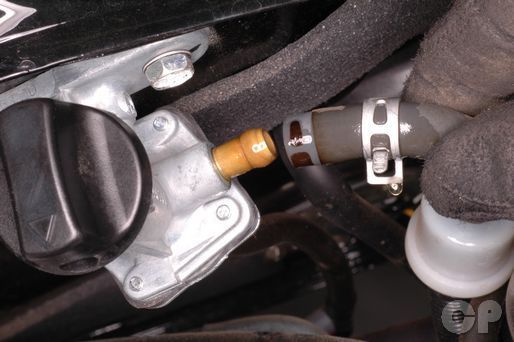


Squeeze the fuel hose clamps and slide them back. Remove the fuel hose/s from the petcock. The forward fuel hose routes to the joint between the right two carburetors and the rear fuel hose routs to the left pair of carburetors.


Remove the fuel vent hose from the fuel tank.


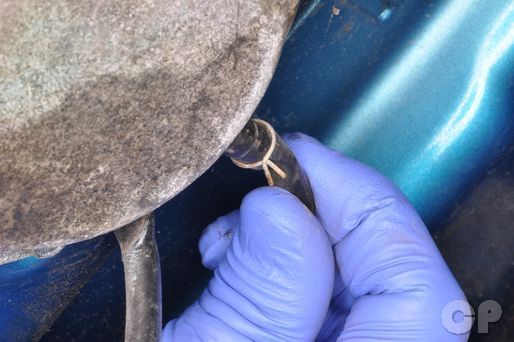
Remove the vacuum line from the petcock.
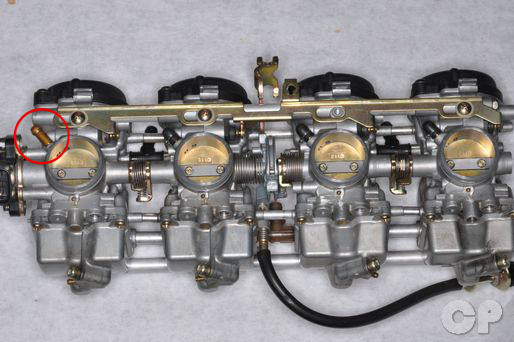
The vacuum line that runs to the petcock comes off of the far right carburetor as indicated.


Remove the fuel level gauge vent hose.


Lift up on the rear of the fuel tank and slide it back to free the tab on the fuel tank from the frame. Remove the fuel tank.
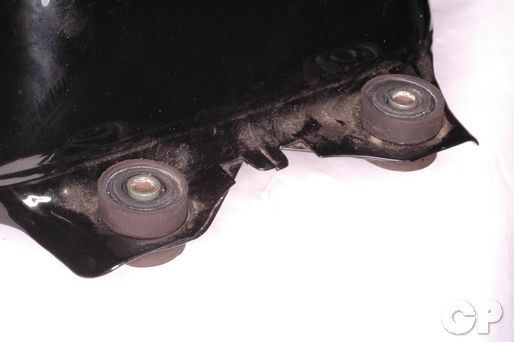


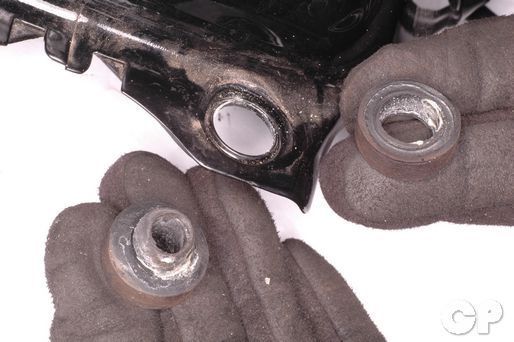
Remove the collars and rubber bumpers from the rear of the frame. Replace the components as needed.
To remove the petcock see the Petcock topic.
To remove the fuel level sensor see the Fuel Level Sensor topic.
Installation

Install the rubber grommets and collars into the rear of the fuel tank.

Fit the fuel level gauge vent hose onto the gauge. Route the vent hose down the inside of the right side of the frame to the clamp at the bottom of the frame joint.
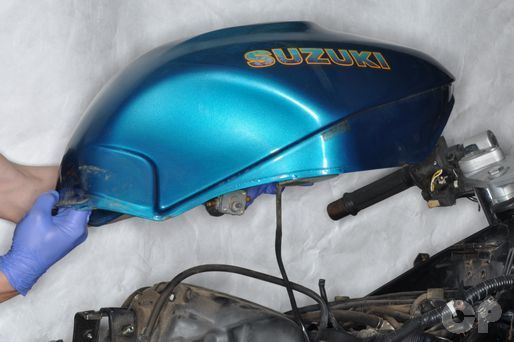
Set the fuel tank into place on the frame. Slide the tab on the front of the tank under the rubber piece on the frame.
Install the vacuum line onto the petcock.
Connect the fuel drain hose to the fuel tank. Route the drain hose down the inside of the right side of the frame to the clamp at the bottom of the frame joint.


Connect the fuel line/s to the petcock. Secure the fuel line/s with the clamp/s.
Plug in the fuel level connectors on the right side of the tank.


Install the fuel tank mounting bolts at the rear of the tank. Tighten the bolts securely with a 10 mm socket.
Install the upper fairings. See the Fairings topic for more information.
Install the seat. See the Seat for more information.
Copyright 2025 - Cyclepedia Press LLC

Note: If you are viewing this document offline be sure to visit the latest version online at http://www.cyclepedia.com before attempting any repairs. Updates are made without notice.